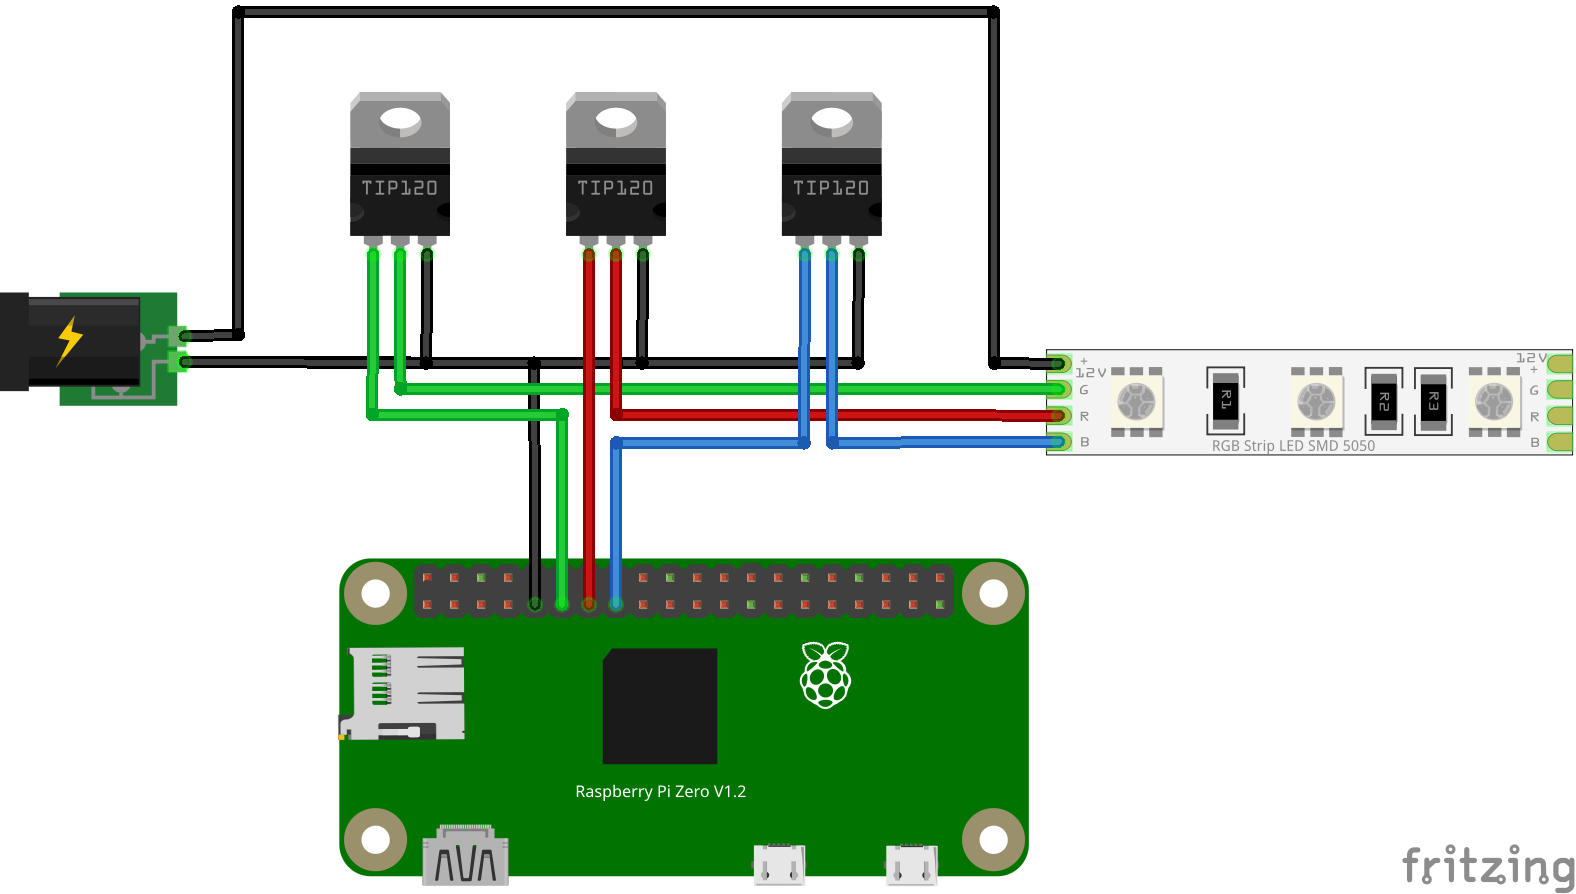
Wiring schematic showing the connections between power supply, Raspberry Pi, TIP120 transistors, and RGB LED strip light
In this guide, you'll learn how to wire a 12 V RGB LED strip light to your Raspberry Pi Zero W and then control each color channel both from the command line and with Python.
Wiring schematic showing the connections between power supply, Raspberry Pi, TIP120 transistors, and RGB LED strip light
At one end of the LED strip light you'll see four leads or pads, typically labeled:
12V G R B
12V (or +) goes directly to the positive terminal of your 12V supply.G, R, and B each feed one color channel.For each color channel:
Tip: insert a ~1 kΩ resistor between each GPIO pin and its transistor base. The base resistor protects both your Pi and the transistor, while still allowing enough current to switch the LED strip light fully on.
Connect the Raspberry Pi's GND pin and the 12 V supply's negative terminal to the same ground rail. That way, the TIP120 emitters and the Raspberry Pi share a common reference.
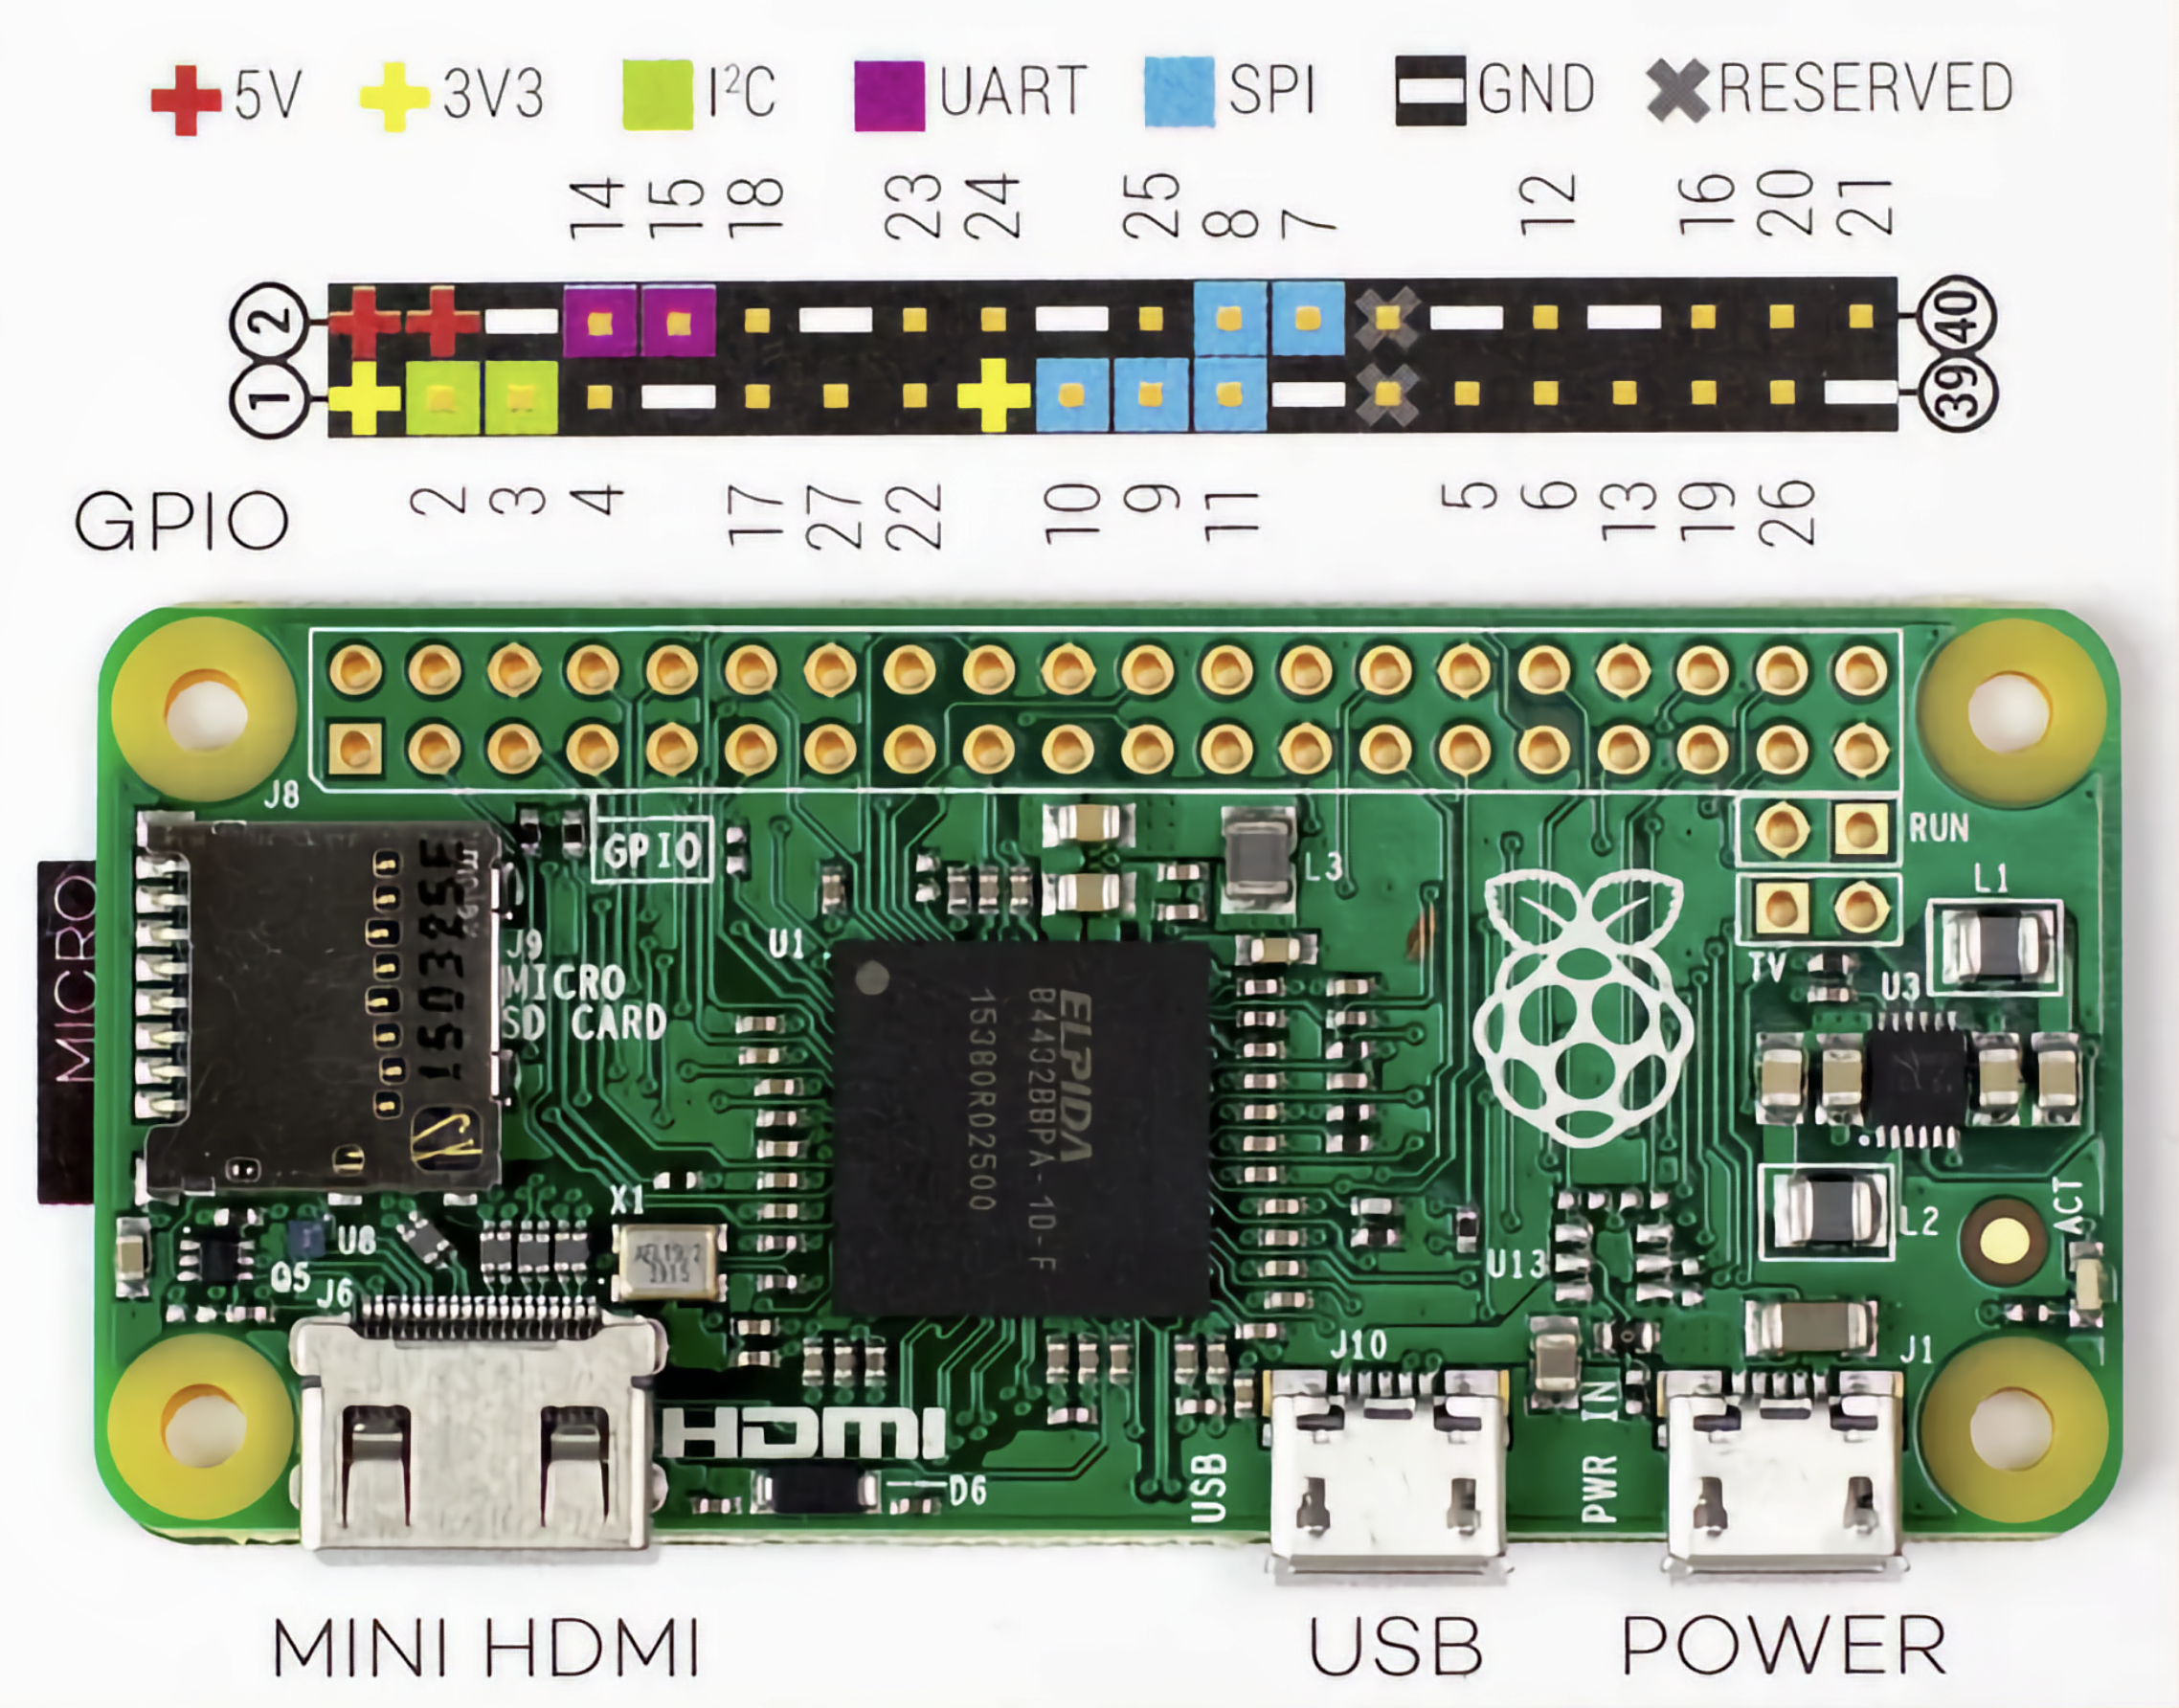
Raspberry Pi Zero GPIO Pinout
On the Pi Zero's 40-pin header, pick three GPIOs for your colors. I'm using the following GPIO pin mapping:
GPIO 27 → redGPIO 17 → greenGPIO 22 → blueAnd use any GND pin to complete the common ground.
pigpiod daemon which is required for GPIO control:
sudo pigpiod
pigs command (from the
pigpio library), which allows PWM control of GPIO pins.pigs p 27 255 # Red to full pigs p 17 165 # Green to medium pigs p 22 0 # Blue offThis will mix red and green to produce orange.
The python code for controlling the LED strip light is available in the GitHub repository https://github.com/janrothen/ledstriplight.